 Honestly speaking, Installing a fish finder device is considered a manageable DIY job as long as you have a little basic info and some essential tools. So, even if you are not up for the job, understanding what a proper installation looks like enables you to assess and troubleshoot your setup on your own.
Installing a new fish finder can turn out to be an intimidating job if it’s your first time. Well, don’t be nervous, it’s relatively considered an easy project that you would be able to tackle over a weekend. So, in this article, you will find a list of tools that you would probably need and guidance on how to install a fish finder on the centre console.
Supplies and tools required to Install
Before you start doing anything, it’s always considered a good idea to inspect your boat closely in order to see what you have to work with. Look, whether your boat has pre-run accessory power wires or not? If not, It will become a necessity to buy an extra cable to run to the battery. With a jack plate, it will help you avoid drilling into your hull by mounting on or underneath it.
Once you are done with the pre-install inspection, take a close look at this list of items mentioned below. You would probably need them, so it’s better to buy them. Nothing eats up time like having to run to the hardware store several times in one day.
-
Fish Tape & Gloves
A fish tape tool is quite helpful while running transducer and power cables directly from the head unit to the cranking battery. The fish tape is actually stiff flat steel that is considered flexible enough to be easily pushed and pulled down the wiring channel exactly under the gunnels of most boats. As far as gloves are concerned, They protect your hands from fibreglass cuts.
-
Cable Ties & Cable Wraps
You would also require lots of cable ties in order to secure and clean up your initial install. Plus, the hook and loop style cable wraps style is also considered quite good for making a clean looking install. So, just try to take some pride in your fish finder install and make sure that you route your cables in a professional-looking manner.
-
Heat Gun
The heat gun is among some important tools that are essential to have. It will shrink the tubing over the electrical connections. Please note, that it is extremely advisable to USE CAUTION while using the heat gun around fibreglass and boat carpet. Avoid pointing the heat anywhere near the gel coat. The problem is that the boat carpet melts quite easily. Plus, the gel coat can be discoloured or sometimes melts in a flash.
-
Shrink Tubing/Electrical Tape
This item might not be as important as others but surely it will provide ease. Some DIYers prefer to cover any wire splices with shrink tubing, they do this for a moisture-resistant connection. The thing is that electrical tape just works well, but can be quite messy and doesn’t give a professional look.
How to install fish finder on center console with ease
The process of installing a fish finder in a center console is not much different to install a fish finder in a Jon boat. Well, the easiest option would be to attach the transducer to the transom and just run the cable over the stern.
As far as sonar image is concerned, anglers with center consoles usually install a through-hull transducer. Please note, that these transducers mount under the boat with the help of a cable running through the hull. So, there is an uninhibited signal and return as a through-hull transducer is away from turbulence and ahead of the motor. As installation requires a hole in the boat hull, it would be better if a professional do the job.
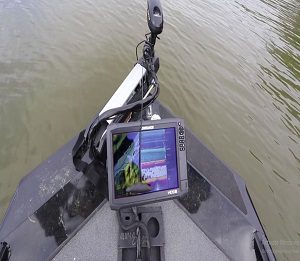
So, now, After the transducer is set, make use of an electrician’s snake to route the cable under the deck and in order to the display. There is more than one option for positioning the display unit. Installing the display on a gear track, many center console boats are specifically designed to enable the fish finder display to be flush mounted to the console.
In order to flush mount the fish finder screen, you only need to use the template available with the instructions. All you need to do is, cut the outline of the display and then tape it in place on the console. Make sure there is enough clearance for wires behind the panel. Tape around the template as well and use a handheld jigsaw or similar saw to follow the line.
Once you find success in placing the transducer and display, then connect the power cord to the electrical panel. Make use of mount head cable ties to easily route the cables to the display unit. Advanced electronics are plug-and-play. Once done with installing the parts and running the cables, just turn on the unit and you are set to go.
You May Also Like to READ:
- What Do You Need for Fishing - August 18, 2022
- How to Find Offshore Fishing Spots - August 18, 2022
- What to Use for Trout Fishing - August 17, 2022