 Deeper is a way easier fishfinder system that suits the novice to pro-level of anglers to get the best out of their fishing trip.
No transducer included, it makes it the castable fishfinder that best works in lakes and rivers but you can also use it on the sea (if the fishfinder supports the higher depth.)
Then how to use a deeper fish finder is super easy; from hooking it on the line, casting it on the water surface, and up to transmitting the data back to your smartphone. Yes, the smartphone acts to display the complete details of what a fish finder is able to locate underwater.
How to Use Deeper Fish Finder
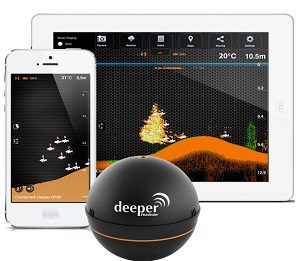
The Deeper fish finder is actually a single castable device in a round shape with no dedicated display.
And it doesn’t matter where you cast it from, whether it is a kayak and the shore of a bank or river.
However, the Deepers can safely work in the ocean water but make sure to better clean it off all the time.
Step #1: Installation of Fish Deeper App
All you need to do is download and install the free Fish Deeper application on your iOS or Android phone.
- Download link to the Fish Deeper App for iOs
- Download link to the Fish Deeper App for Android
This can be your first step to go with using the Deeper fish finder.
Step #2: Charge the Deeper Fish Finder
Since Deeper works with the integrated battery, make sure to charge it to 100 percent to enjoy hours long casting as that may easily hold the battery charge from 3 to 6 hours.
Even though you have an onsite alternative available to charge it up, it may interrupt your fishing schedule and put you on wait to get the fish finder charged up again.
Step #3: Tying Deeper to the Fishing Line
All the Deeper fish finders are castable, meaning you can easily tie them to the fishing line.
Since we take affirmative you have the right kind of fishing line to tie Deeper on. So, we are not heeding to investigate more into the fishing line type, and rather go straight to the best way to attach the Deeper.
Almost all the Deeper fish finders come with two attachment points, and nothing would work there except the attachment bolts for the firm grip.
But you cannot attach the attachment bolt to the random attachment points. It does contain two attachment points but the upper one would be the correct one to screw the attachment bolt as the Deeper may go tilted and would cease to measure the correct data. But this fits when you are fishing from the boat/kayak and in the saltwater where there is lots of movement.
And if you are fishing from the shore of the lake, the below attachment point would be good to go because the water there seems static and you do not have to keep the Deeper moving a lot.
The purpose here is to keep the Deeper fish finder upright floating to ensure the sonar works correctly by staying submerged while the upper part of the fishfinder remains out of the water.
Once the attachment bolt is screwed in (on the top attachment point), now it is ready to tie up with the fishing line’s tag end. Make the Palomar or uni knot (whichever you can comfortably tie-up) for the secured attachment of the fish finder to the line.
And as you get done with the tying part, make sure to keep the line loose and let the Deeper sonar free float.
Note before casting: Check the connection between the Deeper sonar and your smartphone as they both are interconnected.
Step #4: See the Data on your Smartphone Display
Cast in the given range, now the data would be showing up on your smartphone/tablet screen. And we also believe you know how to determine and utilize the data for effective fishing.
Conclusion!
Now, do not ever claim you do not know how to use Deeper fish finder after winding down this whole exclusive guide.
And this guide does not stick to working only for the selective Deeper sonars, let it be Deeper Pro+, Deeper CHIRP, or any other one from the Deeper family; the process would be about the same.
Work it up and make good fishing with Deeper! 🙂
- What Do You Need for Fishing - August 18, 2022
- How to Find Offshore Fishing Spots - August 18, 2022
- What to Use for Trout Fishing - August 17, 2022