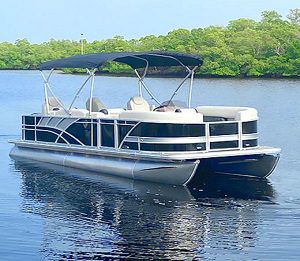
 Uncommon to see but when you have a large pack of fishermen looking to board on a single boat, it is wise to use a pontoon boat because of its advantageous design.
And the obvious one is, of course, the ample space which lets the folks walk freely on the pontoon boat, store their fishing gear close by, and get the dedicated seatings without interfering with anyone.
But that is not what we are after; we rather hop onto another task of how to install fish finder on pontoon boat because it is definite you cannot let anything hanging loose on the pontoon boat, especially the gadgets.
The good thing is even if you have a dozen amateur or professional fishermen onboard, you will only require a single fish finder device to rely on.
So, only arrange for one and get the best out of your fishing trip collectively!
How to Install Fish Finder on Pontoon Boat
We deem it necessary for the fish finder to be properly installed. Despite its lightweight and portable design, we still urge you to not keep it in your hands because of possible mishaps which can shatter and break it.
So, how effectively and properly should you do the fish finder installation on the pontoon boat, stay with us!
List of Materials Required to Install Fish Finder on Pontoon Boat
You must have to possess these materials and tools in order to install the fish finder on the pontoon boat.
- Safety hand gloves
- Protective glass
- Power drill
- 0.6mm drill bits
- Screwdrivers, flat and Philips-head
- 3cm stainless steel nuts with 0.6mm bolts (6 pieces)
- 20’ of plastic conduit
- Rubber and metal washers (6 pieces)
- Sealant (preferably Silicone)
- Terminal connectors
Find the Fish Finder Placement on the Boat
You cannot just hang or mount the fish finder. And you cannot just make holes anywhere. The prime location seems to be anywhere close to the boat wheel where the captain spends most of the time and during the lookout for the fish, the captain stays at the wheel and lets the boat buoy toward locating the fish.
The monitor size is generally bigger and expects it starting from 7” and onward, so it is kinda challenging to locate where to properly mount it.
Now we recommend keeping it as close to the wheel and the console box as possible for a clear view. And that you would not have to turn your head every time just to look at the fish finder monitor.
So, the console here comes with ample space (on the top side) to place/mount anything but make sure when you go about installing the fish finder monitor, you are not interfering with the gauges and wires. Know about the console box as to where the gauges’ connected wires are running towards so that you do not cause damage to them during the drilling procedure.
Locate the Transducer Location
Now comes the question of where to place the transducer up on the pontoon boat?
To our knowledge, the transducer bearing the sonar technology which is the responsible device that transmits the data to the fish finder’s monitor to show the fish’s location, depth of water, temperature, and everything underwater.
And it is obvious the transducer is not submerged and partially touching the water base, which would not be sending in the appropriate data consistently.
But the first thing here is to decide which side the transducer should be mounted on. Luckily, the pontoon boats come with a simple hull design with plenty of room to put it on. And most of the pontoon boat owners like the transducer to place on the starboard (right side of the boat) as well as the bottom of the pontoon, onto the rear of one of the pontoon tubes a.k.a., the toons.
Step #1: Mounting the Transducer
- You have a 0.6mm drill bit, right? Now, drill two holes onto the bottom bracket of the pontoon tube (if you decide to place the transducer on the rear toon.)
- Now, attach the mount that came with the fish finder’s purchase, to the brackets that you just made a hole onto by placing the washer, nut, and bolts.
- After the transducer is secured, place the wire wrapped properly, so get the wire inside the plastic conduit and take it towards the captain’s console where you plan to mount the fish finder display.
Step #2: Installing Fish Finder on Captain’s Console
The closer the display, the better you can track what’s been happening underwater. So, we recommend installing it right on top of the captain’s console box.
- Place the bracket over the preferred location and mark the holes over the console box
- Drill down those two holes carefully because the fiberglass may break and would not hold the bracket. Better is to drill with the small bit then widen up the hole using a 0.6mm drill bit
- Let the bracket sit onto those holes and secure it using the washers, nuts, and bolts
- Apply a bit of silicone around the holes for better strength
- Now drill another little hole close to the bracket for the transducer cord to come out and plug into the fish finder device
Step #3: Through the Wire Properly
It is an extra step out of how to install a fish finder on pontoon boat involving some real hard work but this is absolutely worth your time; protecting the wire from accidentally cutting off, and reducing the clutter on the deck.
Although it is wise to pierce it through the plastic conduit we believe no one would want to have the wires be seen by the human eyes.
- Unscrew the upper siding of the boat, it will take around 10 screws to take out. Make sure to use an extra hand to keep the siding lifted as you unscrew it to avoid bending and damage.
- Place the wire inside the siding and run it through the console box. Once the wire reaches the console, install back the siding and you have everything concealed.
Step #4: Give Power to the Fish Finder
One last step to finally power up the fish finder.
Well, this can take two routes; a fuse box or a battery.
Doing it yourself should not be any difficult and does not require you to be an electrician. A simple piece of instruction can do the job super well.
Going with Fuse Box
- Get the terminal connectors plugged onto the end of the wires
- Head back to the back of the captain’s console box and find a vacant plug if there is any.
- Attach the terminal connector to that empty connection and your fish finder will start working by now
In case there is no vacant connection, then is the time to call in an electrician and make it work.
Powering up via Battery
Okay, you do not have to have an extra battery for this case. The existing battery(ies) which is powering up different equipment of the pontoon battery is fair enough to power up the fish finder which would definitely not put a heavier load.
-
- Get around 20’ of wire
- Plug one end to the connectors by the side of the fish finder. Remember to tie black wire with black, and red wire with red.
- Take the wires through the siding for concealed installation and tie the black wire on the negative post of the battery. Then the red should go onto the positive post.
- Now, power on the fish finder and see it functioning!
Conclusion!
We expect not to go fishing without a fish finder even though it is just for recreation.
The motive here is to catch some, eat, and live the moments. And how to install fish finder on pontoon boat is really not a challenging task on the other hand.
The whole installation is gonna take around 30 to 60 minutes depending on if you go through all of it in one go.
So, get ready to celebrate every casting with good catches! 🙂
- What Do You Need for Fishing - August 18, 2022
- How to Find Offshore Fishing Spots - August 18, 2022
- What to Use for Trout Fishing - August 17, 2022