 In the fishing game, All professionals, anglers, or amateurs can relate to a fisherman’s most frustrating moments: start with a long day out in the hot sun, trying to cast your line everywhere but not getting enough results. Well, this usually happens when the process of casting is done blindly, with no proper idea where the fish are or how deep they are!
There is a specific reason why fishfinders come in handy. It is important to know that not only a fish finder helps you to locate where a fish most likely is, but also indicates how deep it is. And, you can even clearly see your line going down on the screen, so it helps you to know when exactly to stop.
Even most manufacturers claim that fish finders can show you exactly how many fish there are and where. This is true to some extent. But it’s definitely true that they can show you what the underwater world looks like, what type of structure and cover there is, and also tells whether if there are any schools of baitfish swimming around.
An overview of fish finder basic features
StructureScan
This feature uses a specialized transducer that creates three-dimensional images of the area underneath the boat. The image includes the topography of the bottom of the lake and the locations of fish and structures in which fish hides.
Furthermore, It uses numerous beams of sounding order to show incredibly detailed 180-degree views beneath the boat. The amazing thing is that with this wide area, anglers can easily identify brush, piles of rocks, plants, and determine the location of these things relative to their boat.
Side imaging
Side imaging feature in a fish finder is used to scan a 180-degree area with an ultra-thin beam of the radar beam. The area includes almost up to 240 feet to the left and right of your boat which in total indicates coverage of 480 feet.
Now the image from each slice of the 180-degree area is then further added to images taken immediately before and after to build. With this view of the lake bottom and using the GPS feature of the fish finder, you can easily zoom in or mark the location. Plus, Side Imaging’s high-frequency beams display cover, structure, and contour changes very clearly.
Chartplotter
Chartplotter is among the most important features in a fish finder that indicates the boat’s current course and location with contours, depth readings, and navigational aids. Further, It can also be used to create trails of your boat’s path, plot courses, and place markers on your desired fishing spots.
With the help of these new advancements, it has now become possible to get the most information out of a sonar signal. if there is an increased amount of information collected in order to filter out the effects of speeds, temperatures, and water conditions, these options will enable you to see what is underneath the surface of the dark and gloomy waters as though they were crystal clear.
5 easy and simple steps to use a fish finder
Press the button to turn on the fish finder
The process of turning on a fish finder is as simple as hitting the “on” button. So If your boat’s system already has a Multifunction Display also called an MFD which functions to display a combination of the fishfinder, radar, Chartplotter, and other electronics. After this, you will have to choose the fish finder screen from the menu.
Understand the user interface
Same as other consumer electronics, each fish finder device has its own menu system or user interface, that enables you to operate it. The good part is that most modern units are patterned according to the cell phone touchscreen interfaces.
Back then, it was quite difficult and very frustrating to understand how to do even simple tasks like changing the fish finder’s range, zooming in and out, or adjusting the screen brightness or darkness. But honestly speaking, now it’s far easier to perform basic tasks today than it was in the past.
Leave the settings on automatic mode
In most cases, you end up with a fish finder that you are unfamiliar with, well it’s best to initiate by just leaving all the unit’s settings on auto. The fact is that the automatic mode on advanced fish finders is better than what an inexperienced user can accomplish. Plus, auto mode is also effective at establishing baseline performance.
After observing the screen for a while, you will be in a better position to figure out whether you are getting a better view of the underwater world, or is it becoming worst as you make adjustments.
Screen interpretation
As per many anglers, this is generally considered the most difficult part of using a fish finder. When a fish finder is on full auto mode, some fish finders devices will display fish icons as opposed to raw data. Whereas, in reality, these are just not helpful enough and only facilitate hiding some of the information you may be able to grasp much information from looking at the raw returns.
So if you really want to use the fish finder much more effectively, just start eliminating those icons and instead try to search for key features mentioned below:
- Location
- Colour
- Size
- Shape
Catch the fish
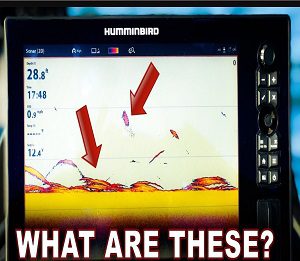
If you notice a hot red return in the shape of an arch that appears to be larger and slightly deeper than a big round yellow mark. Get yourself ready because there is a very high chance that you have seen a big predator, which could be the one you are aching to catch or shadowing a bait ball. But if you observe a red square that is considered quite large, sitting on the bottom, it could be the wreck you were looking for.
- What Do You Need for Fishing - August 18, 2022
- How to Find Offshore Fishing Spots - August 18, 2022
- What to Use for Trout Fishing - August 17, 2022